- ...>Getting Started with Expenses Management
Getting Started with Expenses Management
Learn how to manage employee expense requests in BrightHR, including adding and approving expenses, handling mileage claims, marking expenses as paid, and setting preferences through the PoP app—all from one simple expenses dashboard.
Getting Started with Expenses Management
In this handy guide we explore the expenses section of BrightHR where you can manage expense requests made from your employees and approve submissions to be paid with a click!
Expenses
Logging and managing expense requests all in one place is easy with our expenses section on BrightHR!
Let's take a look at how we can do this...
Who can Access Expenses?
Let's start with the basics, who can access Expenses?
Admins
Admins will have access to approve / decline expenses for the whole company.
Managers
Managers will have access to approve / decline the expenses for their direct reports on BrightHR.
Adding an Expense on BrightHR
Adding an expense couldn't be easier! follow these steps to add your expense to BrightHR for approval:
- First, enter the name of the supplier. For example, if you purchased food or drink, enter the name of the shop you bought it from.
- Next, select the currency (this is set in the expenses app, PoP), enter the tax if applicable and the value of the expense.
- Select the date of the purchase.
- Choose a category which your expense falls under (additional categories can be added in the expenses app, PoP).
- Finally, add some tags and notes.

Adding a Mileage Expense on BrightHR
Mileage expenses can be added in a few simple steps on BrightHR but first there are a few things to note:
- Mileage expenses use Google maps to calculate distance and find start & finish locations.
- Once the distance has been recorded, a rate per mile is used to calculate what the expense would be.
- The rate is set up on the app, PoP where you can set up all specific preferences such as rate per mile, currencies etc.
- Although a base rate cannot be set on the web, the rate can be adjusted when making the expense claim.
- First, enter the starting destination, and then up to 5 stops. Enter the name of the location or a postcode to complete a search on Google maps.
- Next, review the calculation based on the distance as well as the rate per mile, adjust if required.
- Apply any tax if needed that will be included in the claim.
- Select the date of the journey in question.
- Finally, add some notes and tags (tags allow the expenses to be filtered based on the specific tag such as London trip, a date, client name etc.)

Approving / declining an Expense
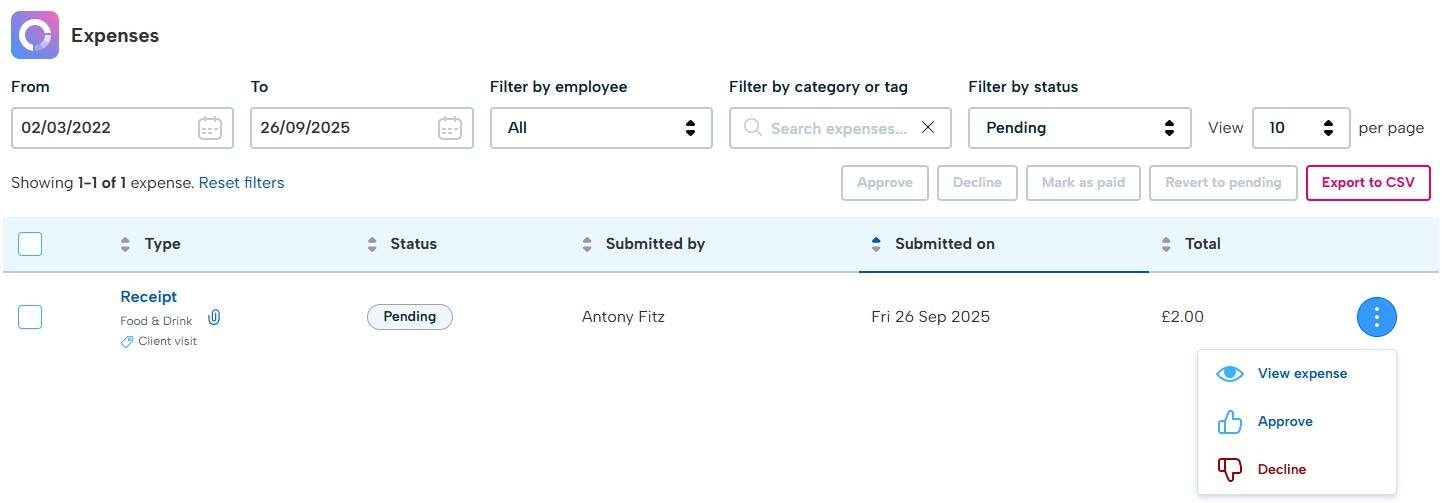
Once an expense is requested through BrightHR or the app, it will make its way to a manager or admin for approval.
The details can be reviewed and then either accepted or declined (if declined a reason will need to be provided).
Marking an Expense as Paid
Once approved, the next step with the expense is to mark it as paid.
Once in the approved section, the option will be come available to mark it as paid. This will be done after the expense has been paid in to their next pay period.
Expense Preferences & Mileage Requests
To set up preferences such as currency, rate per mile and more, you will need to download the expenses app called PoP in order to access these features.